Set up your project repository
Step 1 of the IBM i reference-app setup: add the repository this environment will build from. You do this first because the next step points the connection's build at it and builds the environment.
The ibmi reference app imports with the coderflow-reference-apps repo attached — that's the example source you'll copy from later. What you add here is your own repository, where your version of the app will live.
What you'll need
- A Git repository of your own, with CoderFlow granted write access — so it can open a pull request into it. If your host isn't listed when you add it, a Git Provider needs to be configured for it first.
Add your repository
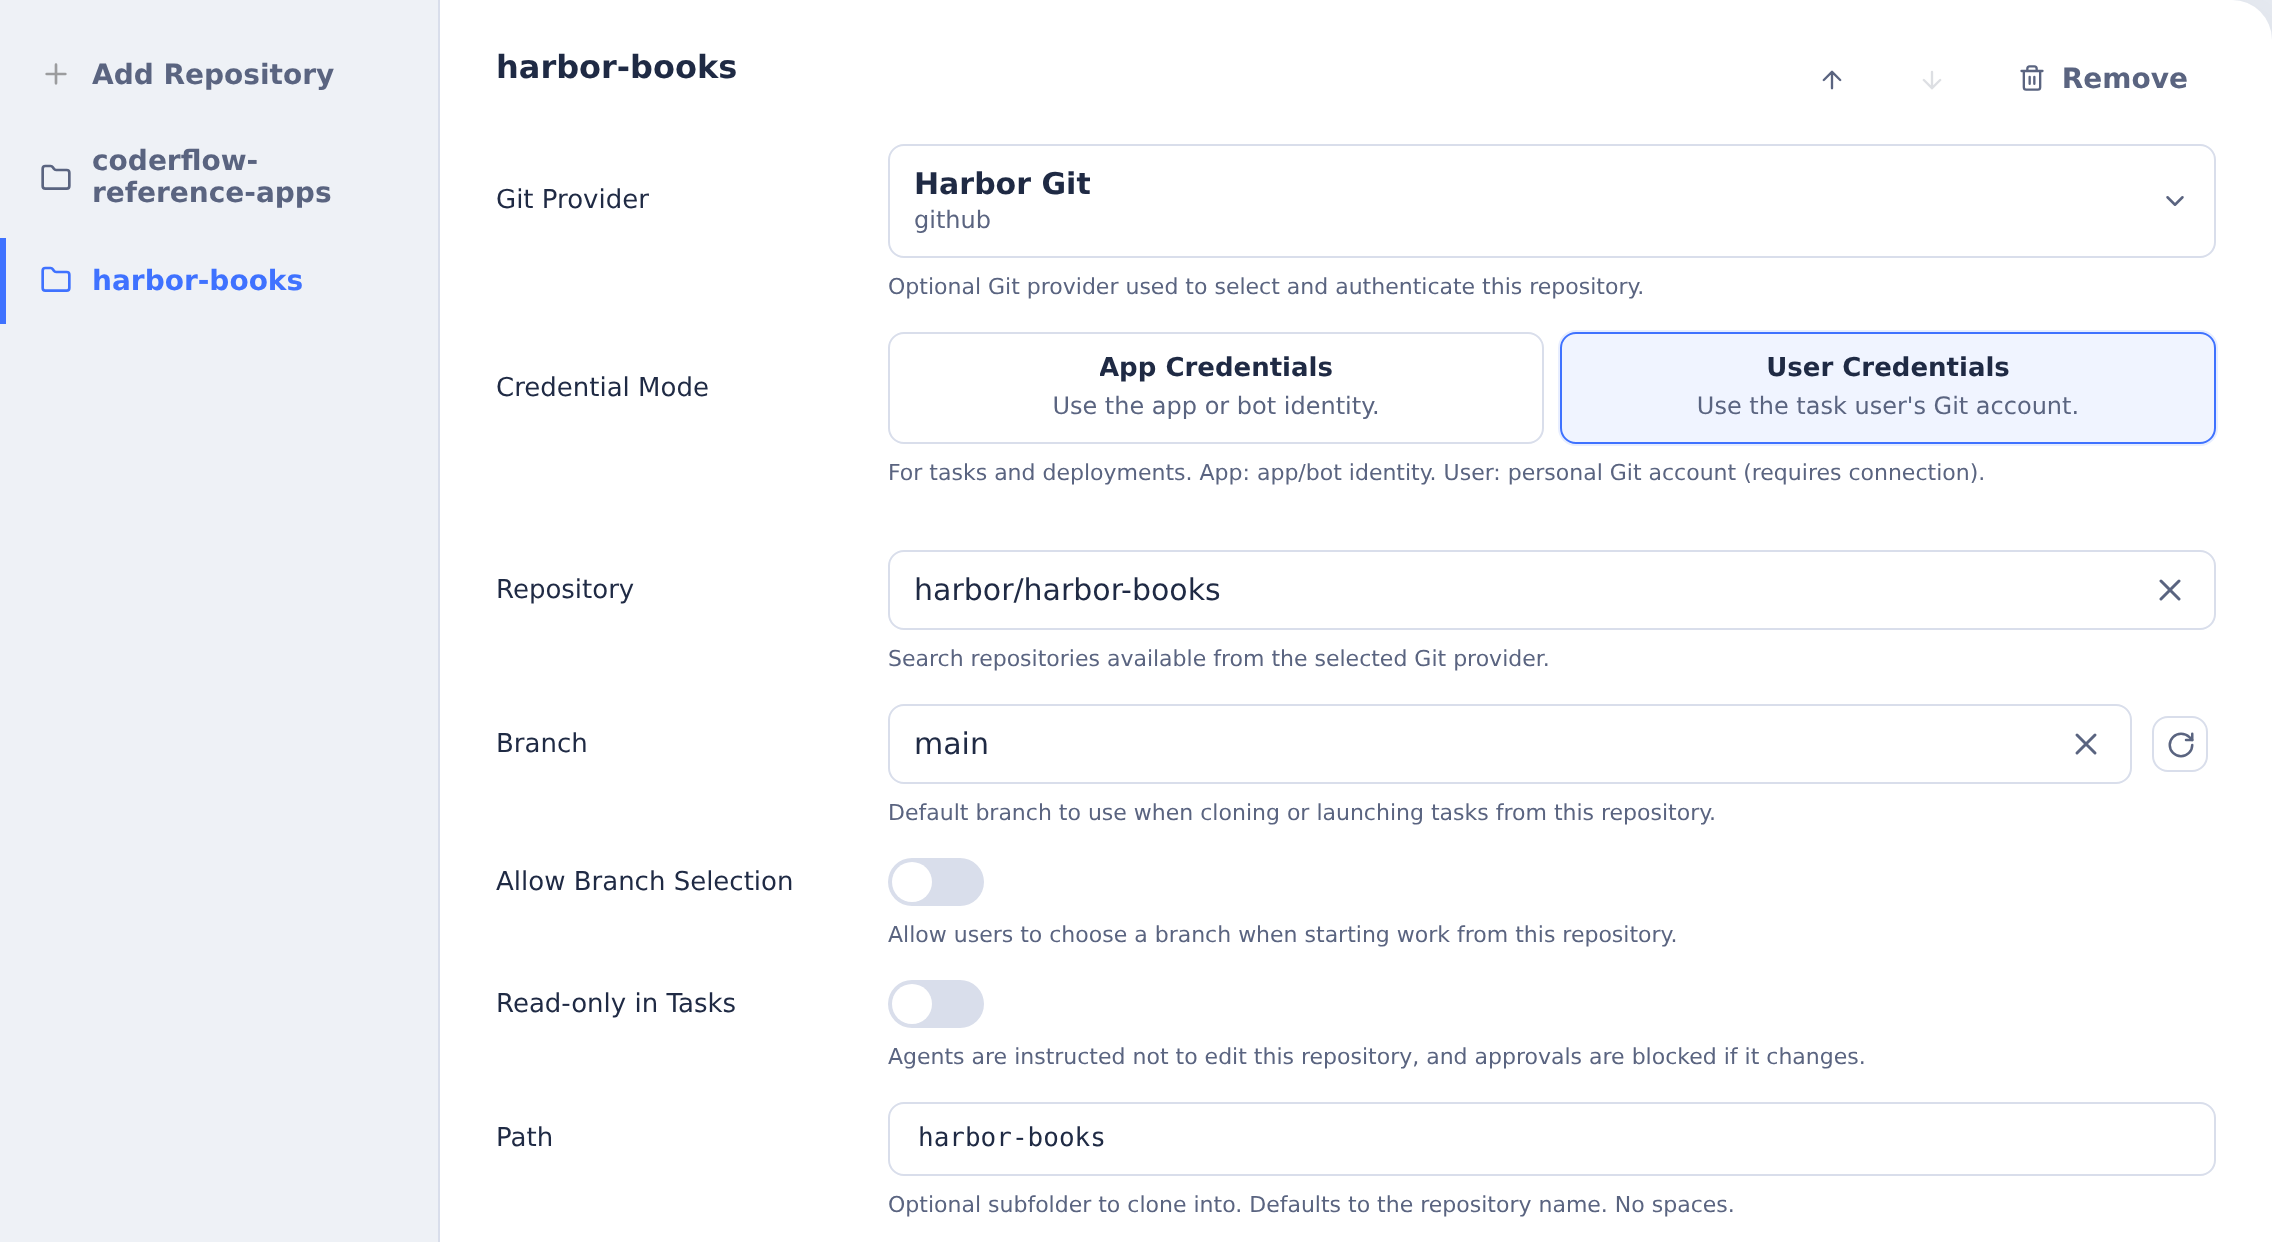
From the setup wizard, click Open the Repositories tab. On the Repositories tab, click Add Repository, choose Select from provider, then choose your provider, repository and branch. For a private repo this is the normal path — the provider supplies the credentials. Pick a provider with write access so CoderFlow can push your approved changes back.
Leave the repository's Path empty for this walkthrough. CoderFlow clones it to /workspace/<repository-name>. This field controls the location of the entire checkout; it does not select a source or documentation folder inside the repository. The connection's Build Directory, configured in the next step, is a separate setting.
Add a new, empty repository that already has a default branch. The simplest way is to create it on your Git host with the "Add a README" option checked — that gives the repo an initial commit and a default branch (e.g. main). A brand-new repo with no commits has no default branch, so CoderFlow has nothing to clone and the build fails. If you created the repo empty, add a README (or any first commit) before adding it here.
Leave coderflow-reference-apps attached temporarily, and enable Read-only in Tasks for that repository. You'll copy its example source into your writable repository in step 3, then detach the reference repository. New application changes belong in your repository.
Next
Continue to filling in the IBM i connection, where you point the connection's build repository at the repo you just added and build the environment.
Related
- Start from a reference app — the full setup flow this step belongs to
- Git Providers — configuring a provider with write access
- Fill in the IBM i connection — the next setup step